
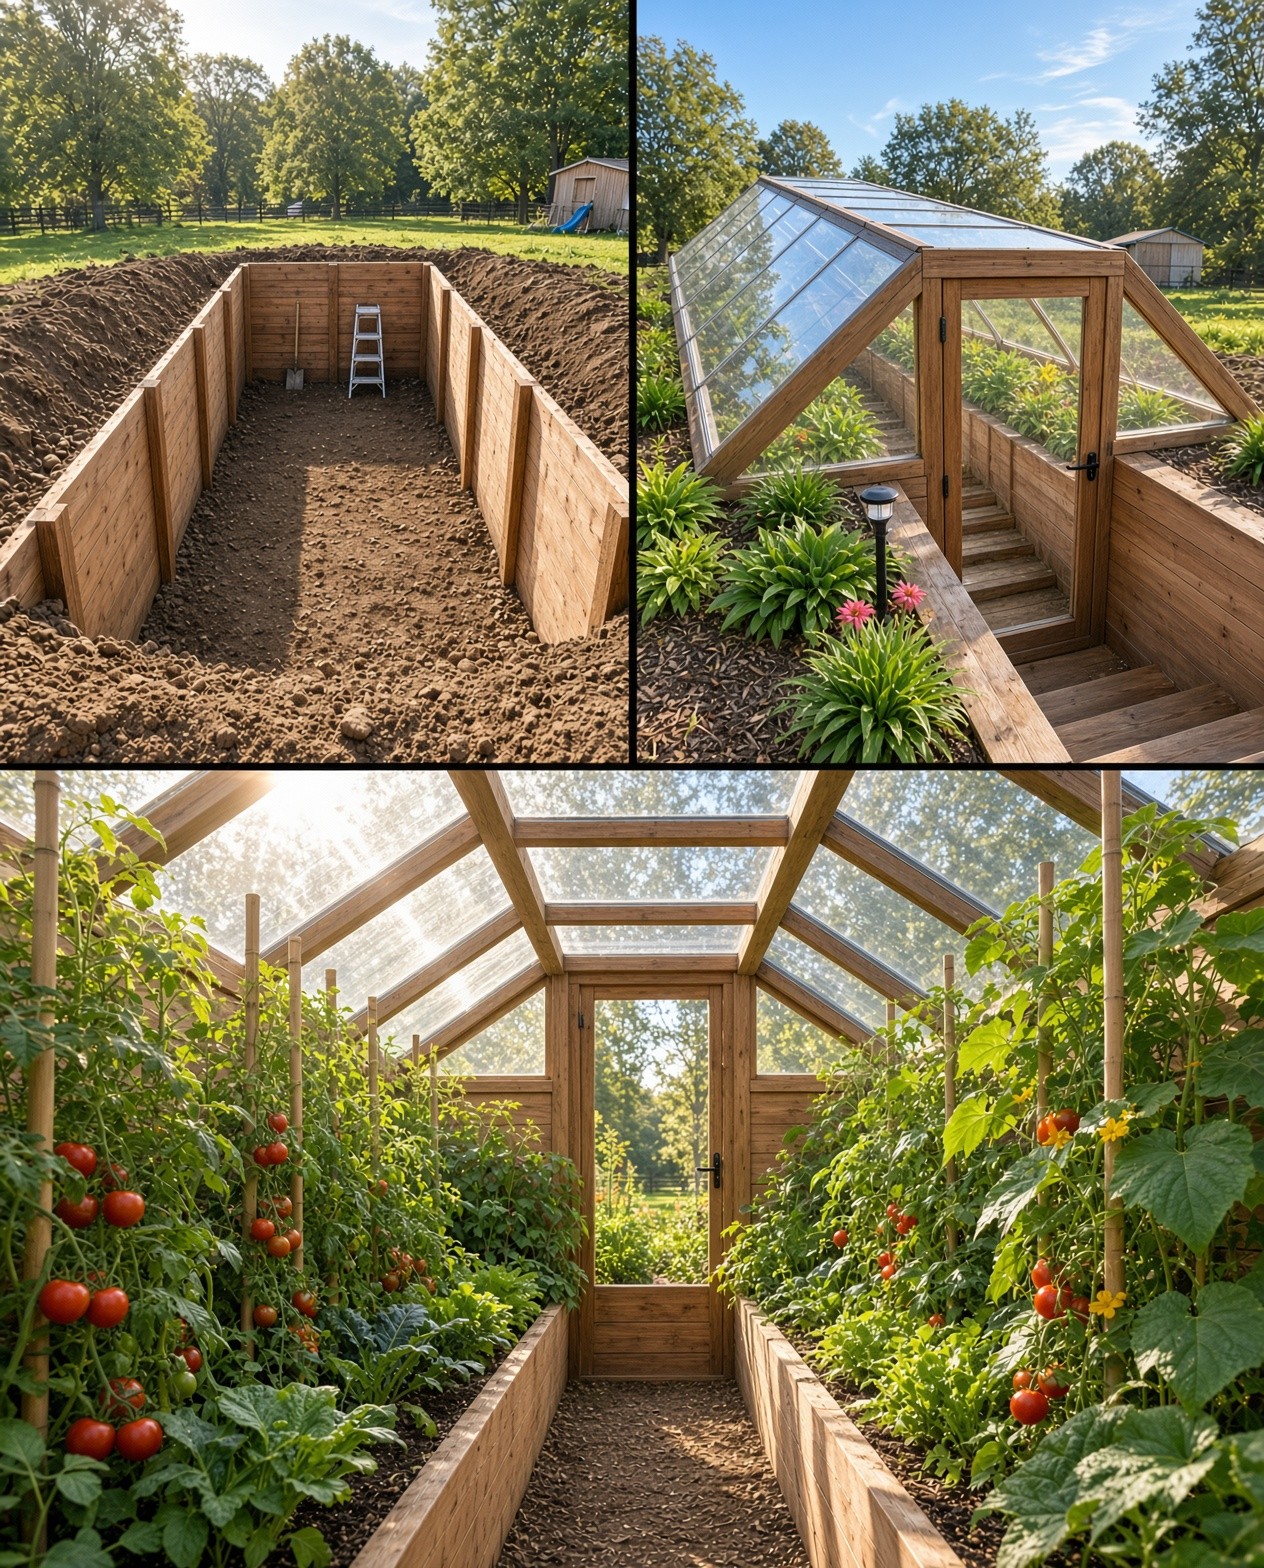
A walipini uses a sunken growing space, sunlight, and the moderating effect of surrounding soil to help extend the growing season. The key to a successful build is careful planning—especially drainage, structural safety, light, and ventilation.

Before you start: this is a planning guide, not an engineered construction plan. A deep excavation can be dangerous. Soil conditions, retaining walls, groundwater, local building codes, and weather loads vary widely; consult qualified local professionals before digging or building.
What makes a walipini work?
The system combines three ideas: sunlight enters through a transparent roof; soil and other dense materials absorb and release some heat; and the earth around the growing space reduces direct exposure to outdoor wind and temperature swings. These effects can extend the season, but they do not eliminate the need for ventilation, moisture control, or cold-weather planning.
STEP 1
Choose the site before you dig
A walipini is a sunken greenhouse that uses earth around its walls to moderate temperature. Its success begins with the site, not the shovel. Look for open winter sunlight, access to water, and a place where rainwater naturally drains away. In the Northern Hemisphere, the main glazed face commonly points south; in the Southern Hemisphere, it commonly points north. Avoid shade from buildings and trees, large root systems, natural drainage channels, and low spots where water collects. Check local permits, buried utilities, soil stability, and seasonal groundwater before planning dimensions.

STEP 2
Excavate safely and design for the soil
There is no universal depth or footprint. The dimensions depend on local climate, soil, access, intended crops, and engineering. Do not copy a generic 6–8 ft (1.8–2.4 m) pit plan without professional review: unsupported soil can collapse, and retaining walls must withstand lateral earth pressure. Have the excavation and wall system designed for the site, keep people away from unstable edges, and never enter an unsupported excavation. Plan a safe staircase or ramp, an easy-to-open exit, and a way to bring materials and harvests in and out.

STEP 3
Treat drainage and waterproofing as essential
A below-ground growing space can collect groundwater, roof runoff, and surface water. Provide a continuous drainage strategy before installing beds: a properly graded gravel layer, suitable perforated drainpipe, and a reliable outlet or sump where needed. Waterproof exterior walls and direct roof gutters and surface runoff away from the structure. Do not assume gravel alone will solve a high water table or heavy clay soil. If the site is wet, flooding-prone, or has no safe gravity outlet, choose a different location or have a qualified drainage professional design a solution.

STEP 4
Build the roof for sun, strength, and weather
The transparent roof supplies solar energy, but it must also withstand local wind, rain, and possible snow loads. Use a properly engineered frame and greenhouse-rated glazing such as polycarbonate or suitable greenhouse film. The best roof pitch depends on latitude, season, material, and structural loads; a single angle is not right for every location. Seal joints, flash connections, and include gutters. Plan safe access for cleaning and inspection without climbing onto glazing that is not designed to carry weight.

STEP 5
Add thermal mass, airflow, and growing beds
Stone, brick, or dark water containers can absorb some daytime heat and release it later, helping soften temperature swings; they do not guarantee frost-free conditions. Install adjustable low air inlets and high exhaust vents, with fans if natural airflow is insufficient. Ventilation helps remove excess heat and humidity, reducing condensation and disease pressure. Add well-drained growing beds with compost suited to the crops, and leave paths wide enough to work comfortably. Monitor temperatures and humidity at plant height rather than relying on outdoor weather alone.

STEP 6
Choose crops and maintain the microclimate
Leafy greens, spinach, kale, parsley, cilantro, and other cool-season crops are often practical starting points. Tomatoes, peppers, and cucumbers need more warmth, light, and space, so success depends on the design and season. Start with crops suited to your local climate and the amount of winter sun available. Check vents daily during bright weather, water according to soil moisture, clean glazing to preserve light, and inspect for pests and fungal problems. Record temperatures through a season so you can adjust ventilation, insulation, and planting dates.
BEFORE BUILDING
Quick planning checklist
- Confirm permits, buried utilities, soil stability, and groundwater conditions.
- Choose a sunny site with a safe way to divert surface runoff.
- Get the excavation, retaining walls, roof frame, and weather loads reviewed by qualified professionals.
- Design drainage, waterproofing, gutters, ventilation, and a safe exit before construction begins.
- Estimate material, labor, maintenance, and possible fan or heating costs honestly.
Common mistakes to avoid
- Digging first and solving drainage later: water management needs to be designed from the beginning.
- Copying a plan from another climate: orientation, roof pitch, glazing, and planting schedules should suit your latitude.
- Underestimating soil pressure: retaining walls and excavation safety are structural matters, not DIY guesswork.
- Sealing the greenhouse without airflow: heat and humidity can build up quickly on sunny days.
- Assuming it never needs heat: monitor actual temperatures and choose crops that fit the conditions.
Is a walipini right for your garden?
It may suit growers who have a well-drained site, useful winter sunlight, and a clear plan for safe construction. On a wet plot, in unstable soil, or where excavation and drainage costs are high, a surface greenhouse or simple hoop house may be a safer and more economical option. Compare the full project cost—not just the roof materials—before committing.