
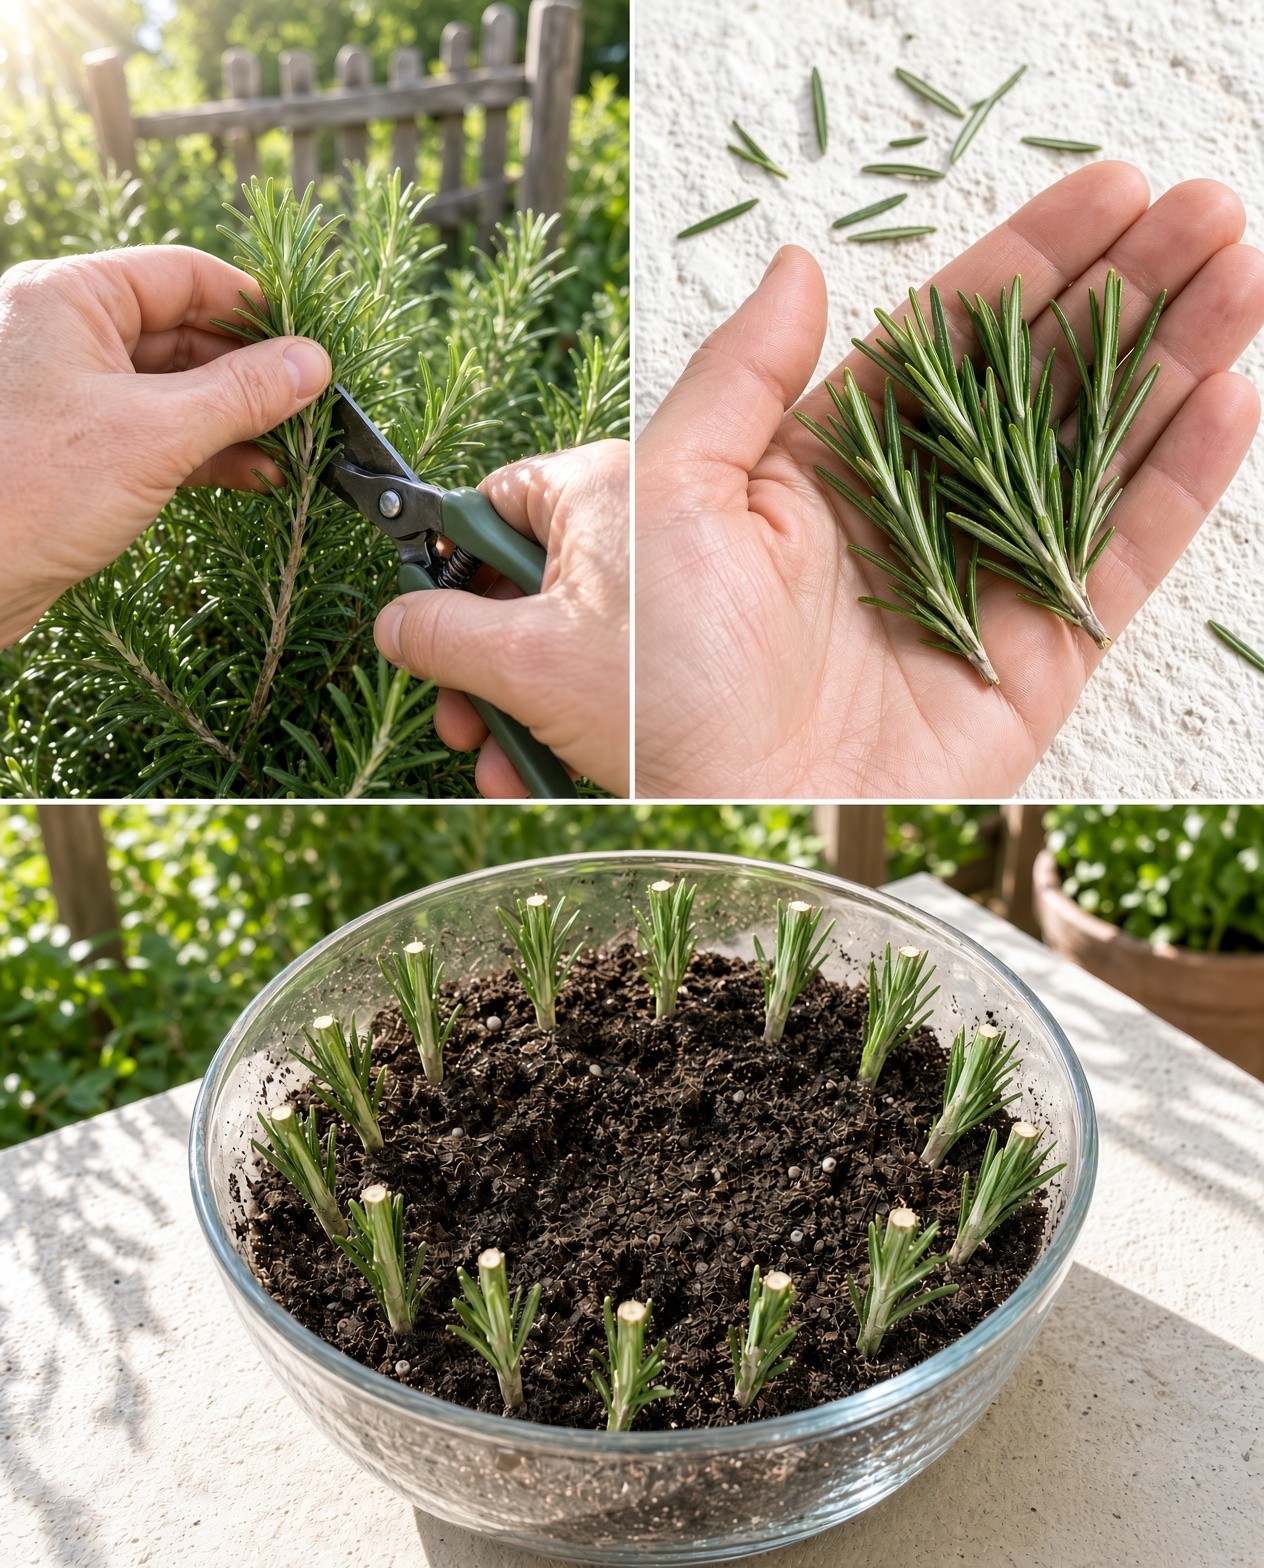
How to Grow New Rosemary Plants from Cuttings: A Step-by-Step Guide
Rosemary is a fragrant, useful evergreen herb, and one established plant can provide the starting material for several more. Propagating rosemary from cuttings is an inexpensive way to reproduce a plant you already know grows well. The key is to choose healthy stems, keep the rooting medium airy rather than soggy, and give cuttings time to develop roots before transplanting.
Why Grow Rosemary from Cuttings?
Rosemary (Salvia rosmarinus, formerly Rosmarinus officinalis) is an evergreen Mediterranean herb valued for fragrant leaves and culinary use. If you already have a healthy plant, cuttings are an inexpensive way to grow more. New plants are very similar to the parent, preserving a variety whose aroma, flavor or growth habit you like. Cuttings also tend to establish more quickly than seed-grown plants, which can be slow and uneven.

1. Choose the Right Time and Parent Plant
Rosemary cuttings often root well in late spring and early summer, when new shoots are actively growing but beginning to firm up. In mild climates, late summer or early autumn can also work if the cuttings have warmth and time to establish. Choose a healthy, pest-free parent plant that has not been stressed by drought or soggy soil. Avoid shoots that are flowering heavily, damaged, extremely soft or completely woody. In cooler regions, root autumn cuttings in a sheltered bright place and protect young plants from frost.

2. Gather Simple, Clean Supplies
You need sharp, clean pruning snips, small pots with drainage holes, and a free-draining rooting mix. A cutting mix or light potting medium amended with perlite or coarse horticultural grit helps excess water escape while allowing air around developing roots. Prepare a clean work surface and label pots if you are propagating more than one variety. Rooting hormone is optional; it may help in some situations, but healthy cuttings can root without it. Avoid heavy garden soil in small pots because it can compact and stay wet.

3. Take Healthy Stem Cuttings
Select non-flowering shoots about 3 to 6 inches long, ideally from fresh growth that is firm but still flexible. Cut just below a leaf joint, or node, with clean snips. Take several cuttings rather than relying on one, since not every stem will root. Do not remove too much growth from the parent plant at once; a few healthy tips are usually enough to start a batch. Keep cuttings shaded while preparing them and pot them promptly so they do not dry out.

4. Prepare Each Cutting
Strip leaves from the bottom inch or two of each stem, leaving foliage at the top. The section placed in the rooting mix should be leaf-free because buried foliage can decay and encourage rot. If the lower end is woody or crushed, make a fresh cut just below a node. You may dip the base in rooting hormone according to the product directions, but avoid overapplying it. Handle the stem gently and keep the top leaves intact so the cutting can photosynthesize while roots develop.

5. Root Cuttings in Potting Mix
Fill small pots with lightly moistened, free-draining mix and make a hole with a pencil or dibber. Insert the stripped end about an inch into the medium, then firm it gently so the cutting stands upright. Space cuttings so their leaves do not crowd. Water to settle the mix and let excess drain away. Place the pot in bright, indirect light rather than hot direct sun, which can dry or overheat a cutting before it has roots. Keep the mix lightly moist, never saturated.

6. Try Rooting Rosemary in Water
Water propagation is another option if you want to observe root development. Put prepared cuttings in a clean glass with enough water to cover the leaf-stripped portion, making sure no leaves sit below the waterline. Keep the glass in bright, indirect light and refresh the water regularly. Roots may appear within a few weeks, although timing varies with temperature, stem maturity and light. Water-rooted cuttings can be delicate when transferred to potting mix, so handle them carefully and keep the medium evenly moist during the transition.

7. Maintain Warmth, Humidity and Airflow
Rooting works best in a comfortably warm spot with bright indirect light. A clear cover or loose plastic bag can retain humidity, but it should not press against leaves and should be opened regularly for fresh air. Excess condensation and constantly wet compost encourage rot. If the cover drips all day, ventilate it more. Keep the pot away from cold drafts, heaters and intense sun. Check the medium with a fingertip and water only when it starts to dry. Rosemary likes good drainage even during propagation.

Aftercare, Common Mistakes and Final Thoughts
Once roots have formed, transfer the cutting to a small pot of well-draining compost. Handle the root ball gently, water after potting, and allow excess water to drain. Keep the young plant in bright light and protect it from harsh sun and wind while it adjusts. If it was under a humidity cover, remove the cover gradually over several days. Introduce it to stronger sunlight little by little as new growth develops. Rosemary is relatively low maintenance once established: water thoroughly, then let the upper part of the mix begin to dry before watering again. Do not leave pots standing in water. In cold climates, protect young plants from frost and wait until severe cold has passed before planting outdoors. Common mistakes include using flowering or very woody stems, burying leaves, keeping the mix soggy, and placing cuttings in hot direct sun. A humidity cover can help, but a sealed, wet environment can cause rot. Start several cuttings, keep them in stable conditions, and resist the urge to disturb them while roots develop. Growing rosemary from cuttings is a simple way to multiply a favorite herb for containers, borders or gifts. Choose healthy shoots, use a free-draining mix and provide bright indirect light with gentle moisture. With patience, a few small stems can become long-lasting rosemary plants for your garden and kitchen.

Extra Tips for Strong, Healthy Cuttings
Choose a spot with stable temperatures rather than a windowsill that becomes icy at night or overheats in direct afternoon sun. If the room is cool, rooting may take longer, so do not assume a cutting has failed just because it has not produced visible roots after a few weeks. The stem should remain reasonably firm and green. Remove fallen leaves from the surface of the mix, since decaying material can encourage fungal problems. If several cuttings share a pot, make sure they have enough space for air to move around the foliage.
When transplanting, avoid moving a tiny cutting straight into a very large pot. A container only slightly larger than the root ball is easier to manage because the potting mix is less likely to stay wet for too long. Use a pot with open drainage holes and empty any saucer after watering. Once the plant is growing strongly, you can move it to a larger container or a sunny garden position with excellent drainage. Rosemary dislikes persistently wet roots, so improving the planting site is more effective than trying to correct poor drainage with frequent feeding.
For outdoor planting, harden off young rosemary gradually. Start by placing it outdoors in a sheltered, shaded spot for a short period, then increase its exposure to outdoor conditions over about a week. Bring it back inside if temperatures drop below what the young plant can tolerate. When it is ready for the garden, choose a sunny position and avoid low spots where rainwater collects. In colder regions, growing rosemary in a container that can be sheltered for winter may be more reliable than planting it in the ground.
Finally, label each cutting with the variety and date. This small habit helps you compare results and remember which parent plant produced the best growth. If one cutting roots quickly and another does not, look for differences in stem maturity, moisture, light and temperature rather than assuming the method is unreliable. A little record keeping turns propagation into a repeatable process, so you can build up a useful supply of rosemary plants over time.