
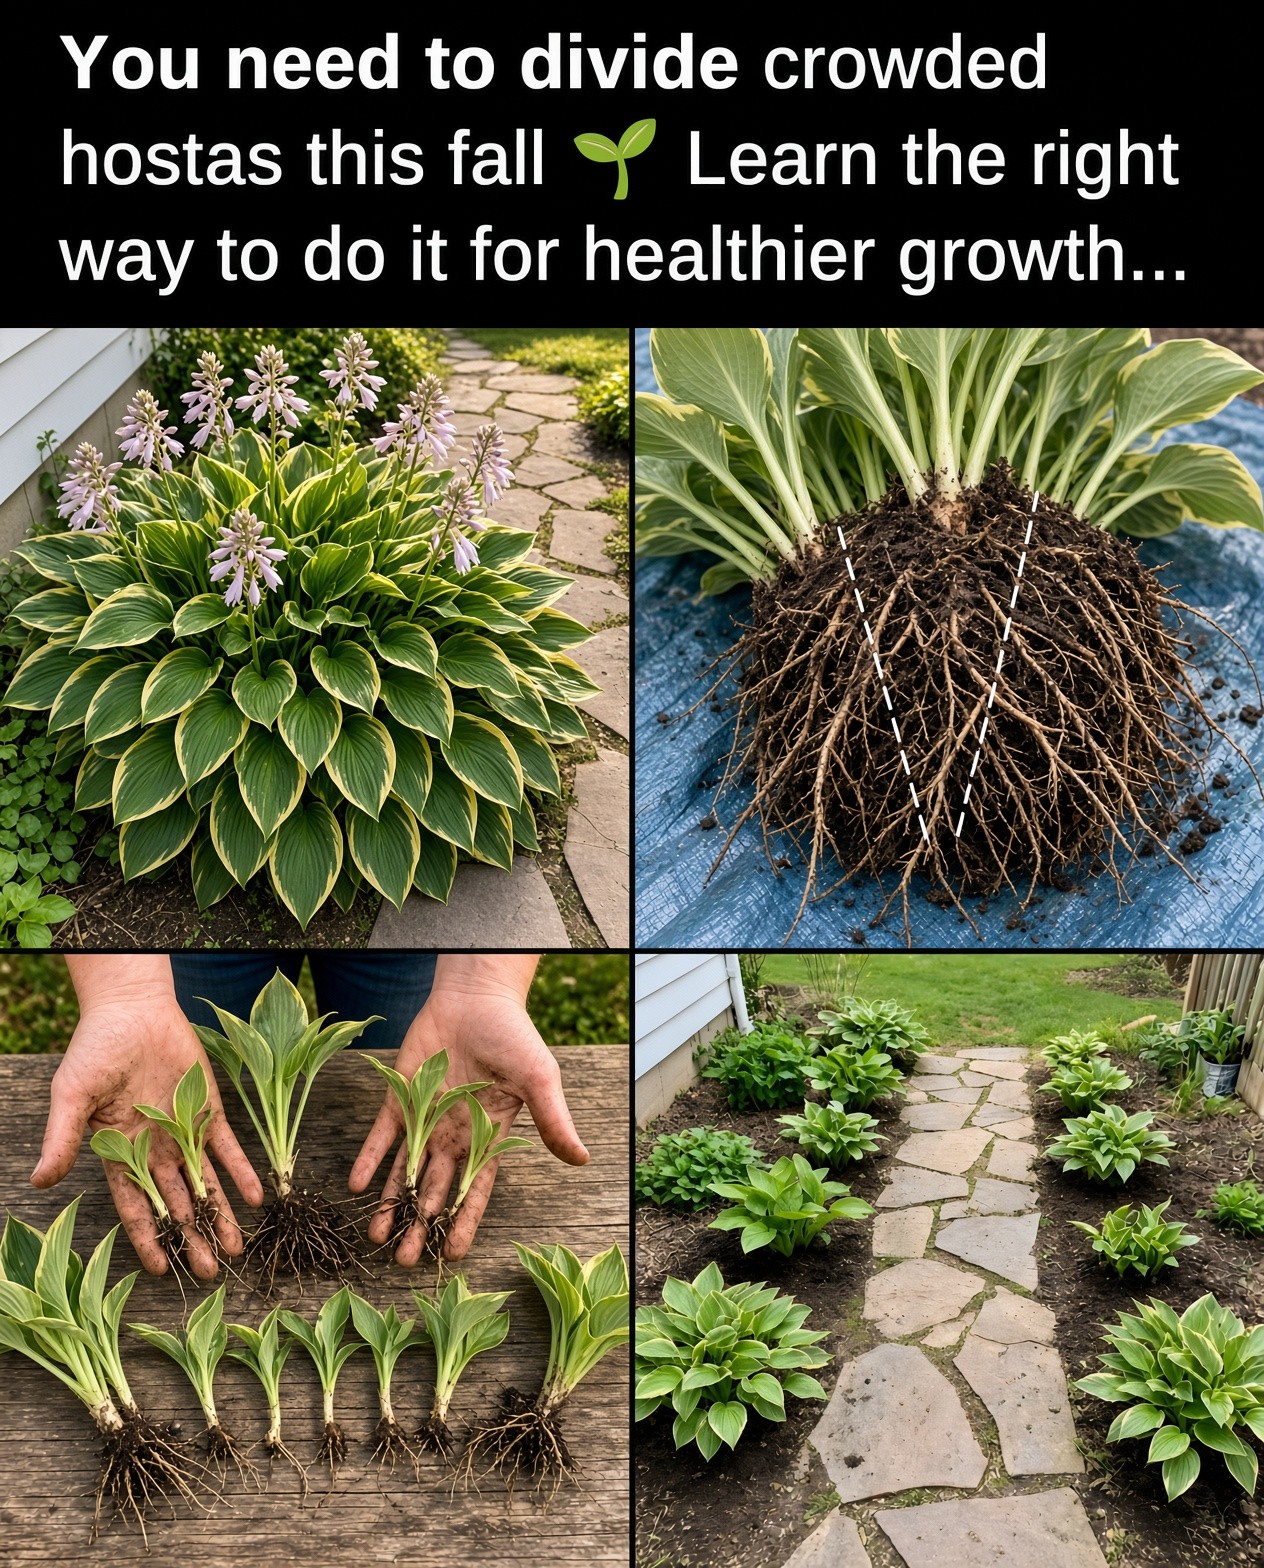
A clear, beginner-friendly guide to choosing the right time, lifting mature clumps, making healthy divisions, replanting them correctly, and caring for the new hostas through autumn.
1. Choose the Right Time
Hostas are long-lived, clump-forming perennials, so an established plant can stay in one place for years. Division is useful when a mature clump becomes crowded, loses vigor, outgrows its space, or needs to be multiplied. The Royal Horticultural Society lists hostas among the perennials that can be divided in autumn or spring. Fall can be a useful window because cooler weather reduces the stress associated with lifting and replanting. The important point is not to divide simply because the calendar says you should. If a hosta is healthy and has plenty of room, leaving it undisturbed may be the best choice. Divide when there is a clear reason and when the soil is workable, temperatures are moderate, and there is enough time for the new sections to settle before severe winter conditions.

2. Wait for Cool Weather
Timing matters as much as technique. A good autumn window is when nights are becoming cooler and the plant is moving away from its strongest summer growth. Avoid peak summer heat, severely dry soil, or a period immediately before a hard freeze. Local climate should guide the exact date. In a cool region, an earlier autumn division may be safer; in a mild region, the suitable window can extend later. The goal is to reduce transplant shock while giving each new section time to establish roots. If the forecast shows an abrupt freeze, postpone the work if possible. Division is not a race. A slightly later job performed under favorable conditions is generally more sensible than disturbing the plant during extreme heat or just before winter.

3. Water Before You Dig
A deep watering a day or two before division can make the entire process easier. Moist soil is easier to penetrate with a spade, and a hydrated hosta is better prepared for the temporary disturbance of lifting. Water deeply enough to moisten the root zone rather than simply wetting the surface. At the same time, avoid digging immediately after heavy rain when the soil is sticky and saturated. Working very wet soil can damage its structure and make the root ball difficult to handle. If the foliage is large, loosely gathering the leaves can also keep them out of the way while you work. Have a bucket or hose available so exposed roots do not remain dry. Good preparation makes division much more controlled.

4. Dig Around the Entire Clump
Begin by loosening the soil around the whole hosta rather than cutting directly through the center. A garden fork or flat-bottomed spade can help you work around the crown and reduce unnecessary root damage. The exact digging distance depends on the size of the cultivar, so a large hosta needs a wider circle than a compact one. Push the tool deeply enough to get beneath the root mass, then work around the plant until the clump begins to lift. Avoid levering hard against one side because this can tear roots and leave part of the crown behind. Once loose, lift the clump carefully and place it on a tarp, board, or clear patch of ground where you can see the crown.

5. Lift the Root Ball Gently
Handle the lifted clump carefully rather than dropping it onto hard ground. Hostas have fibrous roots, while the crown contains the growing points that produce future leaves. Supporting the root ball reduces unnecessary breakage. Brush away enough loose soil to see how the clump is organized, but do not leave the roots exposed and dry for longer than necessary. This is also a useful opportunity to inspect the plant and remove clearly damaged or unhealthy sections with a clean tool. Work methodically from the outside toward the center so you can see where individual growing points are located. The RHS recommends working outward from the crown when lifting perennials to limit root damage.

6. Make Useful, Healthy Divisions
Some hostas separate easily once loose soil has been removed, while dense mature clumps may need a sharp spade or knife. Aim to give every division a useful piece of crown, healthy roots, and several growing points rather than creating tiny fragments just to increase the number of plants. The original article suggests roughly two to three leaf shoots per section, while RHS guidance emphasizes that each piece should have buds and its own root system. Larger divisions usually establish more confidently and produce fuller plants sooner. If a piece has very few roots or looks badly damaged, it is usually better to discard it than to plant a weak fragment. Clean cuts are preferable to repeated sawing and tearing.

7. Replant at the Original Depth
Replant each division promptly after separating it. Prepare a hole wide enough to spread the roots naturally, then position the crown at approximately the same depth at which the hosta was previously growing. Do not bury the growing points under a thick layer of soil. Backfill around the roots, firm the soil gently, and eliminate large air pockets. If the bed needs organic matter, improve the planting area sensibly rather than creating an isolated pocket of very different soil. Hostas generally prefer fertile, moist but well-drained soil and partial or dappled shade. Once planted, water thoroughly so the soil settles around the roots. Correct depth and good root-to-soil contact are more important than complicated planting treatments.

8. Water and Mulch After Planting
Aftercare turns a successful division into an established plant. Water the new sections thoroughly after planting and keep the soil reasonably moist while roots re-establish. This does not mean keeping the bed permanently saturated. Hostas like moisture, but they do not benefit from sitting in soggy winter soil. Check the soil and adjust watering to rainfall, temperature, and drainage. A moderate mulch layer can help conserve moisture and buffer soil temperatures, but keep mulch from piling directly against the crown. Newly divided plants are more vulnerable to drying than established clumps, so do not assume autumn rain will always be enough. As temperatures fall, watering needs usually decrease.

9. Give Divisions Time Before Frost
Newly divided hostas need a reasonable establishment period before severe winter weather. The plant may not produce much new top growth in autumn, but roots can still settle into surrounding soil while temperatures remain moderate. Keep the planting area protected from unnecessary disturbance and monitor moisture. Hostas naturally die back in late autumn, so yellowing or collapsing foliage after division is not automatically a sign of failure. What matters is that the crown and roots were planted correctly and were not allowed to dry out during establishment. In regions with very early hard frosts, spring division may be safer for some cultivars. Local climate and the specific hosta matter more than following a universal date.

10. Do Not Divide Too Often
More divisions do not automatically mean healthier hostas. Splitting a plant every year or two without a reason can prevent it from developing the substantial clump that makes mature hostas attractive. The original article recommends allowing several years between divisions, while RHS guidance focuses on dividing older or congested clumps. Use the plant as your guide. If the center remains vigorous, foliage is strong, and the hosta has enough room, there may be no need to disturb it. Division is best treated as periodic renovation rather than routine pruning. A healthy established hosta often rewards patience with a larger and more impressive display.

11. Consider Spring for Some Cultivars
Fall division is practical for many hostas, but it is not the only option. The RHS recommends both spring and autumn division, and some cultivars may establish more reliably when divided in spring, especially where autumn arrives quickly or winter is especially wet and cold. The source article specifically notes that certain hostas, including ‘Sieboldiana’ and ‘Tokudama’ types, may be better candidates for spring division in some areas. If a plant is valuable, slow-growing, recently stressed, or difficult to establish, consider whether waiting for spring would reduce risk. The same basic method applies: lift carefully, preserve healthy roots and growing points, replant at the original depth, and water thoroughly.

12. Plan for Stronger Plants Next Season
Fall division is ultimately about giving a mature hosta more room to perform, not simply producing extra plants. When done at a suitable time and followed by careful watering, replanting, and mulch, division can refresh a congested clump and create new planting points around the garden. Label divisions if you grow named cultivars, especially when leaf colors and sizes differ. Keep simple notes about which sections came from which parent plant and where they were replanted. Hostas naturally go dormant, so the absence of leaves during winter is normal. When new shoots emerge in spring, you can judge how successfully each division settled. With sensible timing and gentle handling, one established hosta can become a healthier group of plants without sacrificing the character of the original clump.
