
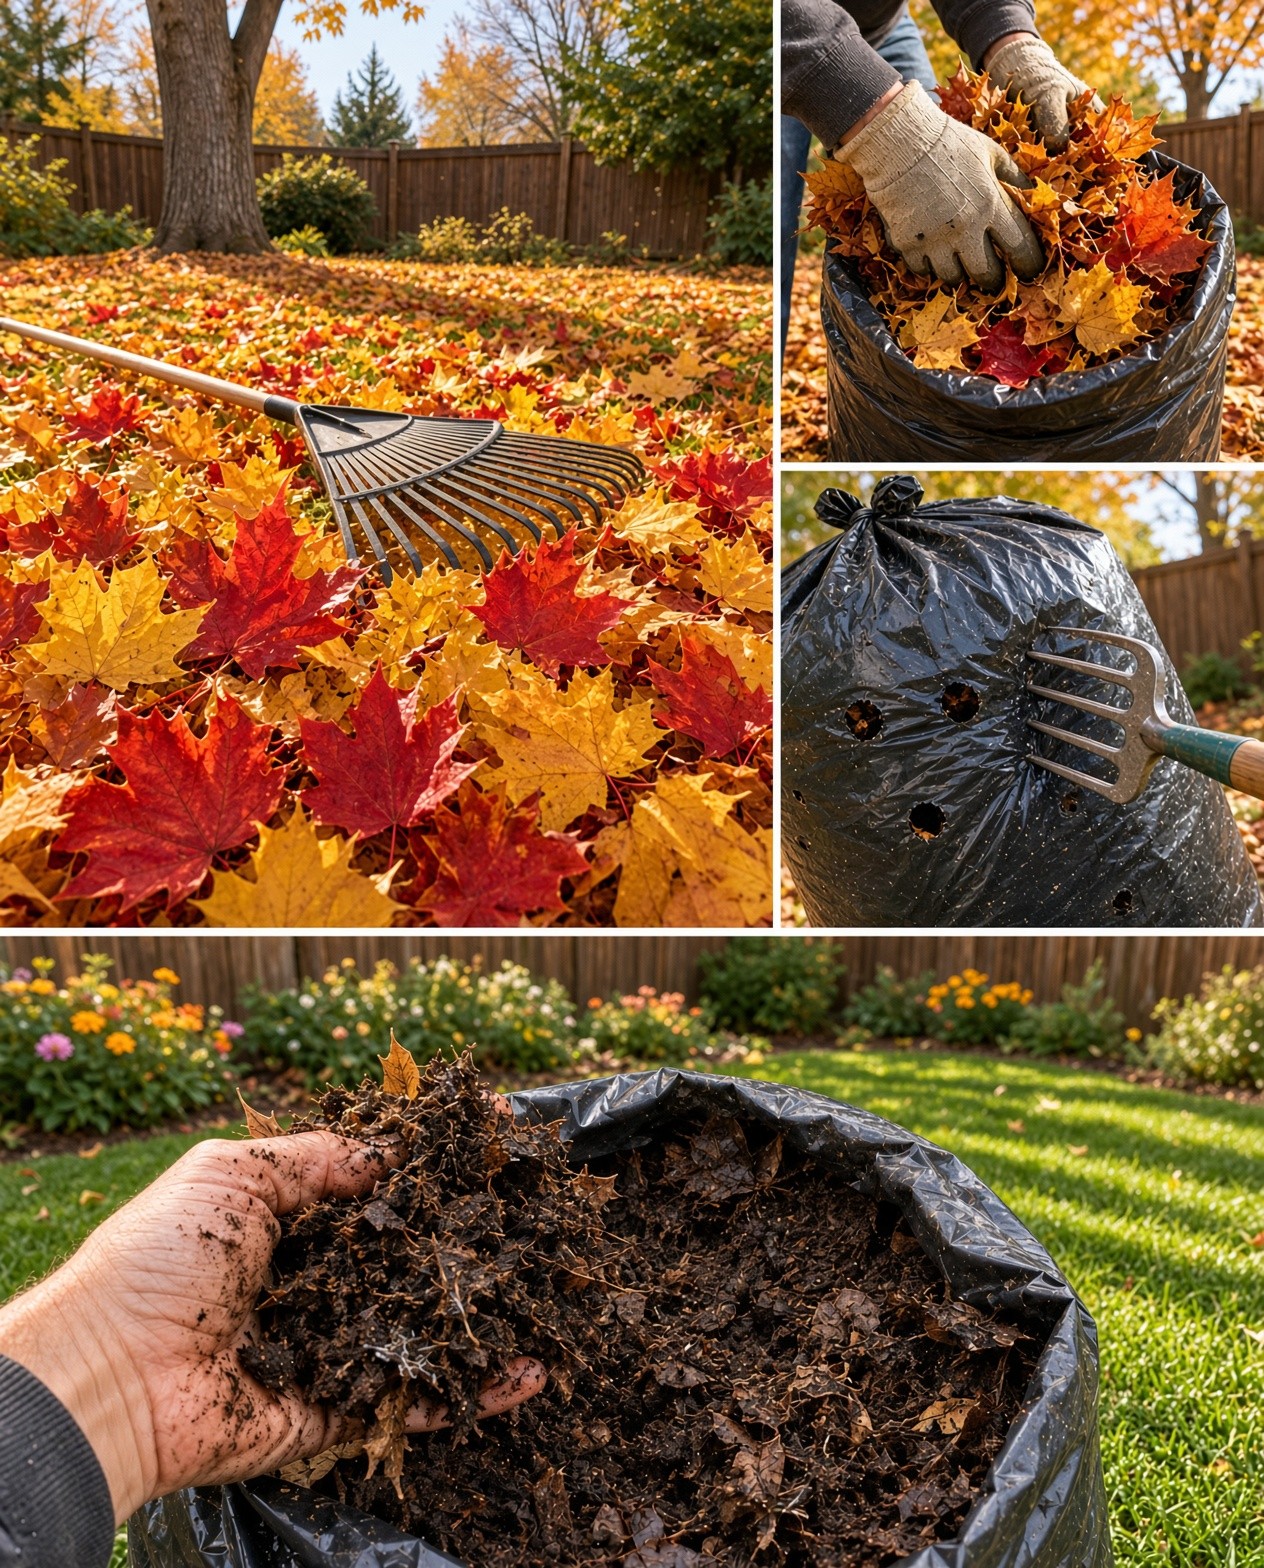
Don’t bag up your yard leaves for municipal pickup! Transform fall leaves into dark, crumbly “black gold” soil conditioner with zero special equipment required.

Figure 1: Millions of tons of organic gold drop from trees every fall—don’t throw them away!
Guide Contents
1
The Autumn Leaf Dilemma: A Massive Wasted Opportunity
Every year around mid-October, suburban backyards across the nation witness the exact same exhausting routine. Deciduous oak, maple, birch, and ash trees shed what seems like a mountain of foliage across lawns and garden beds. For hours on end, homeowners dutifully rake, blow, and stuff hundreds of thousands of pounds of fallen leaves into thick paper yard-waste bags, leaving them out on the curb for municipal collection.
The supreme irony of this annual ritual is that just a few months later, in early spring, those exact same homeowners drive right back down to their local nursery or garden center to purchase plastic sacks of commercial soil conditioner, compost, and moisture-retaining mulch!
By throwing away your autumn leaves, you are literally discarding hundreds of dollars’ worth of nutrient-rich organic matter that Mother Nature crafted specifically to nourish the earth beneath your feet. What if you could turn those leaves into “black gold” soil conditioner with almost zero labor and using nothing more than a standard garbage bag?
2
The Science of Leaf Mold vs. Traditional Compost
Before diving into the bag technique, it is vital to understand what happens to leaves as they decompose. Most gardeners are familiar with traditional active hot composting. Hot compost relies on a carefully balanced ratio of green nitrogen materials (kitchen scraps, fresh grass clippings) and brown carbon materials (straw, cardboard), paired with constant turning to generate high heat through rapid **bacterial activity**.
Key Scientific Difference
Traditional compost is driven by high-heat bacterial breakdown. Leaf mold, on the other hand, breaks down slowly via cool fungal activity. Cold fungal decomposition slowly breaks down tough lignin and cellulose in leaves without requiring added nitrogen or elevated temperatures.
Because leaf breakdown is a slow, cool, fungal process, you do not need to construct expensive wooden composting bins, balance complex chemical ratios, or turn piles every three days with a pitchfork. Fungi work slowly and steadily in dark, cool, moist environments—making a simple, sealed plastic trash bag the perfect environment!
3
Why Leaf Mold is Worth Its Weight in Gold
Leaf mold is not an aggressive, heavy fertilizer high in macro-nutrients like nitrogen or phosphorus. Instead, consider leaf mold the ultimate soil structure conditioner. Its incredible benefits for lawn and garden soil include:
- Unrivaled Water Retention: Mature leaf mold can hold up to 500% of its weight in water, helping your garden beds stay moist during scorching mid-summer droughts.
- Loosens Dense Clay Soil: Blending coarse leaf mold into tight, compacted clay opens up tiny air pockets, allowing plant roots to breathe and spread rapidly.
- Increases Sandy Soil Retention: In sandy soils, water runs straight through like a sieve. Leaf mold acts like a microscopic sponge, binding sand particles together and retaining moisture.
- Encourages Beneficial Earthworms & Fungi: Earthworms feed heavily on decaying leaf matter, turning your soil beds into a subterranean network of nutrient-rich castings and aerated tunnels.

Figure 2: Running a lawn mower over leaf piles shreds leaves into tiny pieces, accelerating breakdown time by months!
4
Comprehensive Step-by-Step Guide: The Trash Bag Method
Step 1: Rake and Shred Your Leaves
Rake your fallen leaves into a central pile on your lawn. While you can process whole leaves, shredding them drastically increases the surface area available for fungal spores to colonize. Whole leaves naturally mat together like wet roof shingles, blocking air and moisture flow.
Pro Tip: Run a basic rotary lawn mower equipped with a bagging attachment over your leaf pile twice. The mower blades will chop the foliage into small, dime-sized pieces, cutting your waiting time down from two full years to just six months!

Figure 3: Heavy-duty 42-gallon black contractor bags absorb solar heat and retain moisture perfectly.
Step 2: Pack Heavy-Duty Trash Bags
Collect your shredded leaves and stuff them tightly into heavy-duty 30-to-42-gallon black plastic contractor bags. Standard thin white kitchen trash bags tear easily when handled or moved. Black contractor bags are UV resistant, retain internal humidity, and absorb sun heat during chilly autumn days. Fill each bag roughly 3/4 full so you retain enough slack at the neck to tie it securely later.
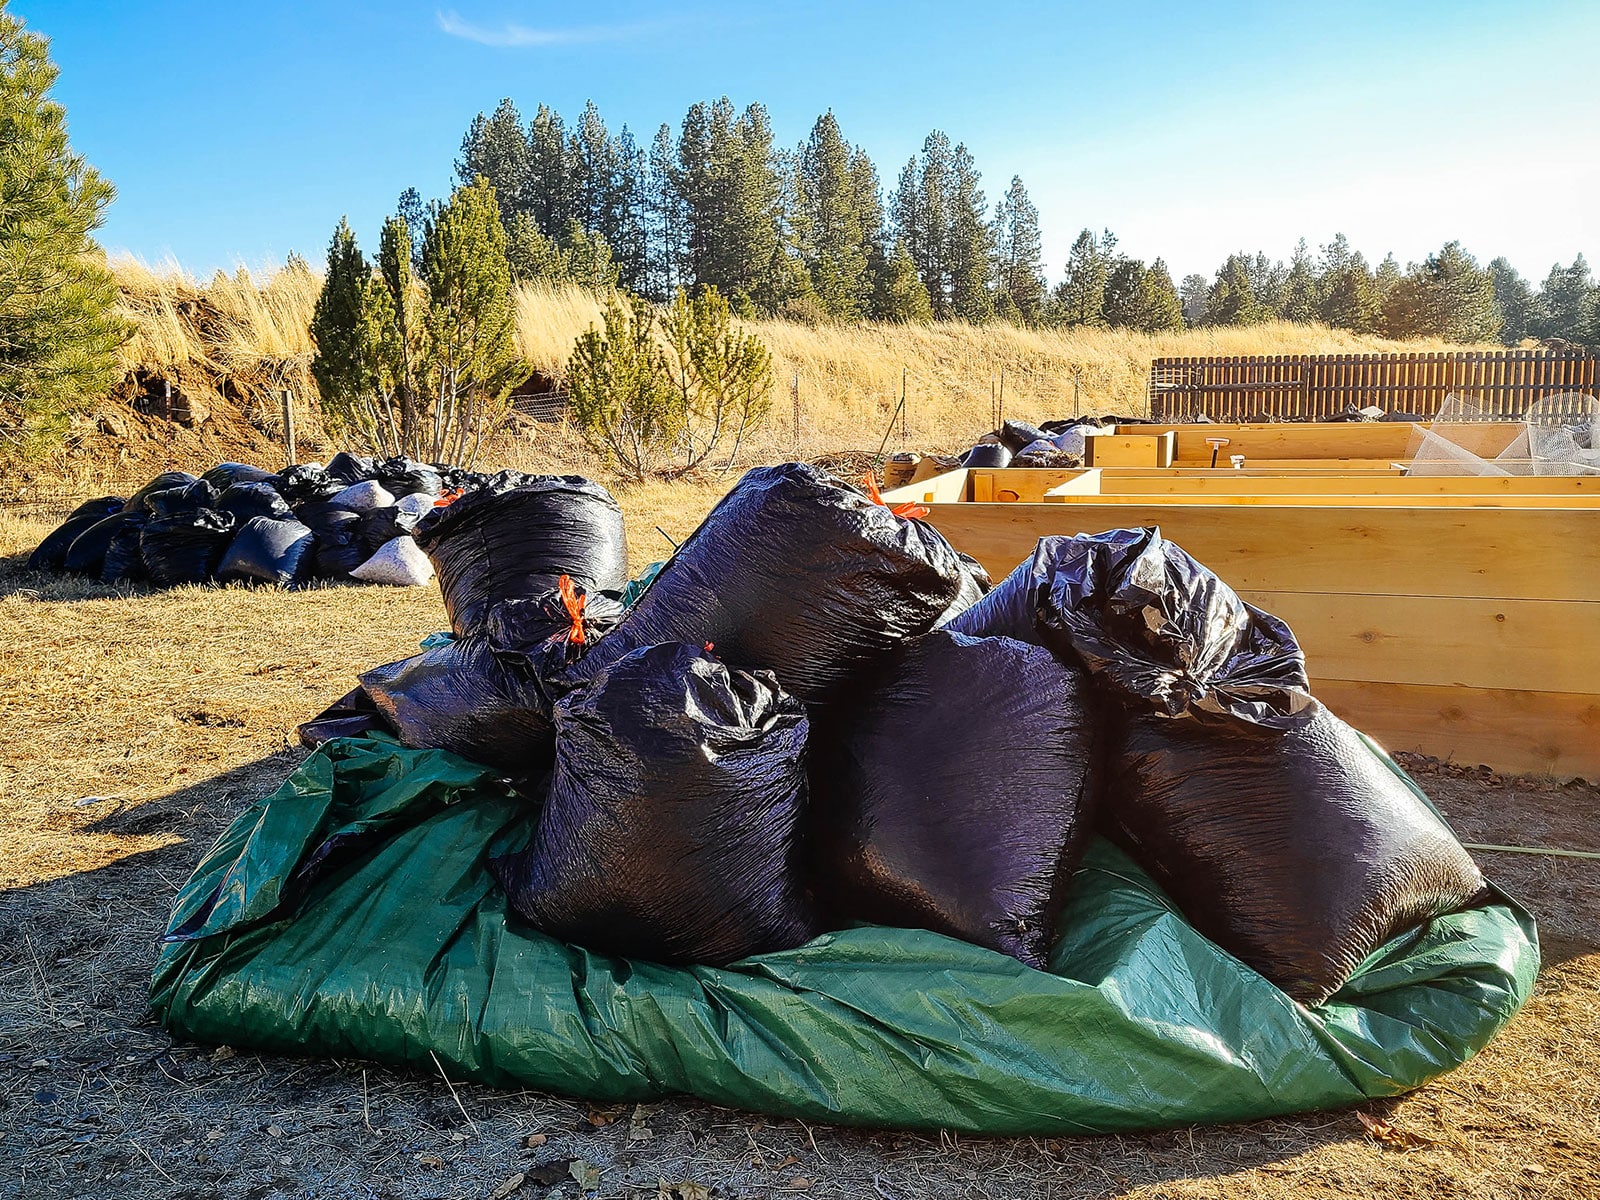
Figure 4: Thoroughly drench leaves inside the bag and poke ventilation holes with a fork to ensure aerobic decay.
Step 3: Moisture Check & Aeration Holes
Fungi require moisture to survive and decompose leaf cell structures. Insert your garden hose directly into the open bag neck and thoroughly drench the leaves with water. Close the bag tightly and shake it vigorously for 30 seconds to distribute moisture evenly.
The Sponge Test: Reach into the bag and grab a handful of leaves. They should feel as damp as a wrung-out kitchen sponge. Squeezing hard should yield only 2–3 drops of water. If water streams out, add a few more dry leaves. If no moisture appears, add more water.
Finally, grab a garden fork, screwdriver, or sharp pocketknife and poke 10 to 15 small aeration holes randomly across the bottom and sides of the bag. This provides vital oxygen transfer so anaerobic rot doesn’t turn your leaves into a foul, smelly sludge.
Step 4: Storage & Maintenance
Tie the bag neck securely and drag it out of sight—tuck it behind a garage, under your back deck, along a fence line, or behind a garden shed. All you need to do now is wait!
Every month or two, give the bag a gentle roll or flip to redistribute moisture and internal fungal colonies. If the leaves look dry during a warm spell, add a splash of fresh water.

Figure 5: The glorious result! Soft, dark brown, earthy-smelling leaf mold ready to spread onto garden beds.
5
Critical Mistakes & Leaves You MUST Avoid
While leaf mold processing is extremely forgiving, a few common mistakes can ruin your batch or harm your garden down the road:
Black Walnut Leaves
Black Walnut trees contain juglone, an allelopathic toxin that inhibits growth or kills nightshades (tomatoes, peppers, potatoes). Avoid bagging walnut foliage!
Diseased Foliage
Leaves infected with black spot, powdery mildew, or rust should be thrown in municipal burn piles. Cold fungal processing will not destroy plant pathogens.
Thick Oak Ratios
Oak leaves contain high tannin concentrations and thick waxy coatings. Shred them finely and mix them with maple or birch leaves so they decompose faster.
Do NOT Add Kitchen Waste
Adding food scraps or green waste converts your bag into an anaerobic compost bin, attracting rodents and producing unpleasant odors. Keep it leaves-only!
6
Practical Application Methods: How to Use Leaf Mold
When your leaf mold smells like a fresh forest floor after rain and crumbles easily in your palm, it is ready to work its magic! Here is how to apply it:
- Summer Moisture Mulch: Spread a 2-inch layer of crumbly leaf mold around vegetable crops, berry bushes, and flower borders. It acts as a protective blanket, preventing weed seed germination while reducing outdoor irrigation needs by up to 50%.
- Garden Bed Soil Amendment: Fork 3 to 4 inches of leaf mold directly into topsoil before planting spring perennials or seedling transplants to significantly boost soil fertility and structure.
- Custom Seed-Starting Mix: Screen leaf mold through a 1/4-inch hardware mesh to remove large debris. Mix equal parts sifted leaf mold, coconut coir, and perlite for a light, moisture-retaining homemade seed-starting substrate.
- Winter Plant Blanket: Pile loosely rotted leaves 4 to 6 inches deep around sensitive tender perennials or root crops before winter frosts arrive to insulate root zones from freeze-thaw cycles.
Frequently Asked Questions (FAQ)
How long does it take for trash bag leaves to turn into leaf mold?
Shredded leaves held in damp black trash bags break down into rich leaf mold within 6 to 10 months. Whole, unshredded leaves (or thick oak leaves) generally take 12 to 24 months.
Does leaf mold make soil acidic?
Fresh autumn leaves are slightly acidic, but as fungal decomposition progresses over time, the resulting leaf mold stabilizes near a neutral pH of 6.5 to 7.0. It is safe for all garden plants!
Can I make leaf mold without plastic trash bags?
Yes! You can construct a simple wire mesh cage (chicken wire shaped into a 3ft x 3ft cylinder). Plastic trash bags simply retain moisture more consistently in dry climates.
Stop Wasting Free Autumn Gold!
Next fall, when you see leaves fluttering down onto your yard, don’t view them as a chore—view them as free organic soil conditioner! Grab a few heavy-duty trash bags, add a splash of water, tuck them out of sight behind your shed, and enjoy premium, dark, nutrient-rich leaf mold by next season.