
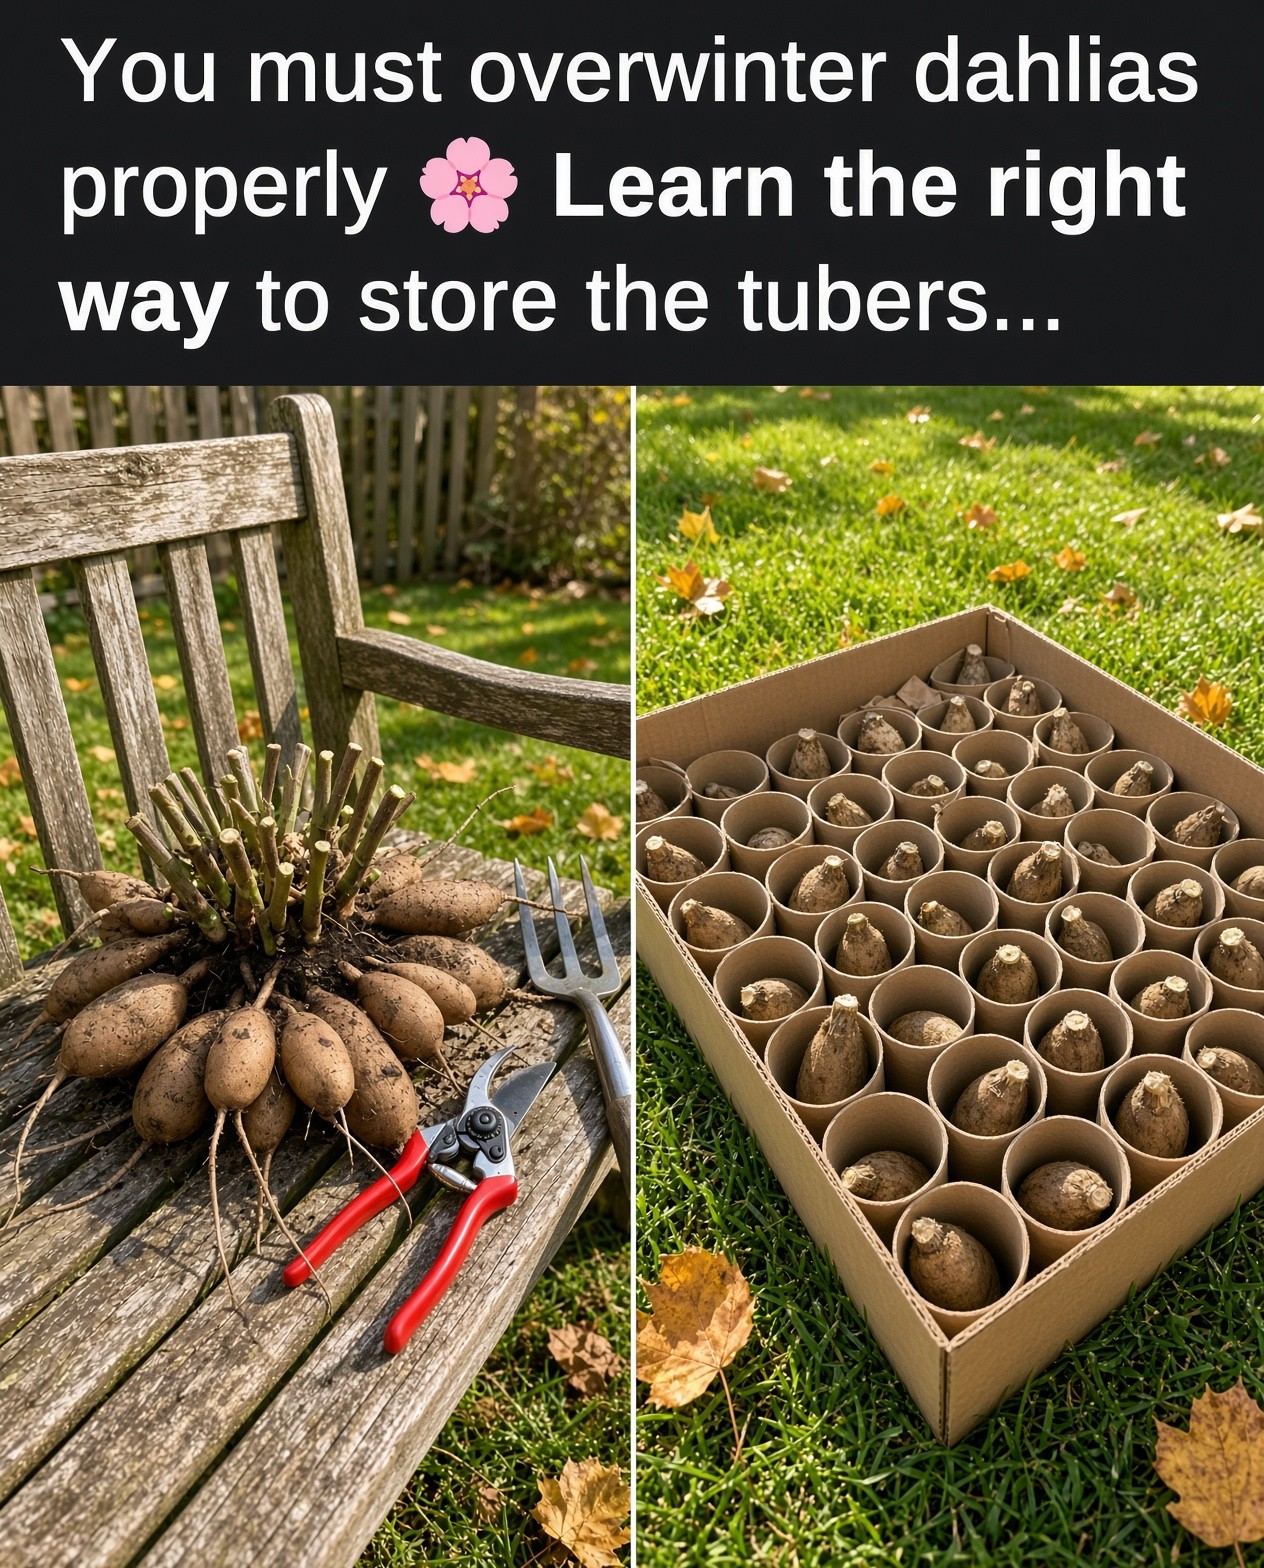
Dahlias can flower year after year when their tubers are protected from freezing soil and excess moisture. This guide explains when to lift them, how to avoid damaging the crown, how to cure and store the clumps, and what to check before planting again in spring.
Why Save Dahlia Tubers?
Dahlias bring colorful blooms into late summer and autumn, and their underground tubers can often be saved for another season. In regions with freezing winters, lifting and storing the tubers protects them from frozen soil and prolonged winter wetness. The process is manageable when you work gently and keep the tubers cool, protected, and regularly checked.
Dahlia tubers are swollen storage roots attached to a crown. New shoots emerge from buds, often called eyes, near the crown and old stem. A tuber that breaks away without crown tissue or an eye may not grow, so avoid pulling or twisting clumps apart.

1. Choose the Right Time
In cold-winter areas, many gardeners wait until the first killing frost blackens the foliage. If weather allows, a few extra days can help tubers finish maturing. Penn State Extension notes that dahlias need a long growing season to develop mature tubers; however, do not wait until the ground freezes.
If a hard freeze is forecast or the soil is waterlogged, lift the clumps before the ground freezes. In mild climates with free-draining soil, some gardeners leave dahlias in the ground under protective mulch, but heavy winter rain and severe cold increase the risk of losses. Local climate and soil drainage matter.

2. Label and Cut Back
Label each variety before digging while you can still identify flower color and form. Use durable tags and a weather-resistant marker, and keep the label with the clump throughout drying and storage. This simple step prevents a collection of mystery tubers in spring.
After frost damages the foliage, cut the stems back to a few inches above the crown. Avoid cutting into the crown itself. Dahlia stems are hollow and can hold water, so do not leave long open stems exposed during storage preparation.

3. Dig Carefully
Use a garden fork or spade and begin well away from the main stem. Loosen soil in a broad circle rather than plunging a tool close to the crown, where tubers are easy to slice. Work around the plant from several sides until the whole clump can be lifted.
Support the clump from underneath and lift gently. Never yank the stems: the narrow neck connecting each storage root to the crown can snap. Heavy soil may take longer to loosen, but careful digging can save valuable tubers.

4. Clean and Inspect
Shake off loose soil carefully. If soil is sticky, you can brush it away or gently rinse the clump so you can inspect the tubers. Guidance differs on washing, but the aim is the same: remove excess wet soil, avoid damaging the thin skins, and let the clump dry properly before packing.
Discard badly rotted or diseased material instead of storing it with healthy tubers. Look for soft, collapsing areas, unpleasant odors, or extensive damage. Cuts and broken necks can allow decay to develop, so handle the clumps as fragile plant material.

5. Cure Briefly
After cleaning, let tubers dry for a short period in a shaded, airy place protected from rain and direct sun. Many extension recommendations suggest about a day or two, depending on humidity, temperature, and how wet the clumps were. The surface should no longer be dripping before storage.
Do not leave tubers exposed for too long in warm, dry air, where they can shrivel. Avoid direct sunlight and heaters. Curing means removing surface moisture and allowing minor handling marks to dry—not dehydrating the tuber completely.

6. Divide Now or in Spring?
Many gardeners store clumps intact and divide them in spring, when the eyes are easier to identify. This reduces fresh cuts before winter storage. Others divide in autumn because smaller sections are easier to label and pack, but it requires a careful hand and a clear view of the crown.
Every viable division needs a sound tuber attached to crown tissue with at least one viable eye. A plump storage root alone may not grow if it has no crown connection. If you are unsure where the eyes are, keep the clump intact and divide it before planting in spring.

7. Choose Cool, Frost-Free Storage
The goal is a cool, dark place that stays above freezing. Many extension sources recommend roughly 40–50°F (4–10°C), with some growers favoring the lower end. A cool cellar or suitable frost-free storage room may work if the temperature stays reasonably steady.
Avoid spaces that repeatedly warm up, freeze, or become damp. Warm storage can encourage premature sprouting; freezing can kill tubers. Use a thermometer to check actual conditions rather than guessing, and avoid storing them in a heated living room or an exposed shed during severe cold.

8. Pack in a Suitable Medium
Vermiculite, wood shavings, peat-based material, sand, or other clean packing media can work. The right choice depends on the room’s humidity and how well the container retains moisture. Pack gently and avoid damaging the tuber necks or crowns.
The medium should not be wet. Too much moisture encourages rot, while very dry air can make tubers shrivel. Use a suitable box or container and avoid sealing wet tubers into an airtight environment. Check the storage conditions regularly and adjust gradually if needed.

9. Check During Winter
Inspect stored clumps every two to four weeks. Remove any that are soft, moldy, or rotting before decay spreads. Check for condensation and damp patches, especially when several clumps share a container.
Wrinkling may mean the tubers are losing too much moisture. Review the storage environment and, if needed, very lightly adjust the packing medium. Do not soak the tubers or make the medium wet. Aim for a stable balance rather than dramatic changes.

10. Replant in Spring
In spring, inspect the clumps and discard those that are completely rotten or lack a viable crown and eye. Divide if needed, ensuring each section has a healthy tuber, crown tissue, and at least one eye. If the eyes are hard to see, wait until they become more apparent rather than making uncertain cuts.
Plant outdoors after the danger of frost has passed and the soil has begun to warm. Choose a sunny spot with well-drained soil and follow spacing advice for the variety. Avoid overwatering before shoots become active. Once growth is underway, steady moisture and appropriate support help plants develop strong stems and abundant blooms.

Common Problems
Rot often points to excess moisture, poor ventilation, damaged tubers, or storage that is too warm. Shriveling often means the tubers are losing too much moisture, while premature shoots suggest the storage area is warmer than ideal. Use these clues to adjust conditions without changing everything at once.
Careless division is another common cause of loss. The tuber body stores energy, but the crown is where the growth buds form. Make deliberate cuts and retain crown tissue with each viable section. If you cannot identify the eyes confidently, store the clump intact and divide in spring.

A Quick Storage Checklist
Before storage, make sure every clump is labeled, diseased pieces have been removed, excess soil and surface water are gone, and the tubers have had time to cure in a ventilated place. Pack them in a medium suited to your conditions and keep them cool, dark, and frost-free.
Write down where the tubers are stored and set a reminder to inspect them through winter. In spring, check for rot, divide if necessary, and plan the garden layout. A simple routine is easy to repeat and can help protect favorite varieties.

Final Thoughts
Overwintering dahlias is a seasonal skill that improves with practice. The essentials are straightforward: allow tubers to mature, dig gently, label clearly, dry only as much as needed, and store them cool without letting them freeze, rot, or shrivel. No method is completely foolproof, and varieties can differ in how well they store.
Start with a few healthy plants and keep notes about your storage conditions and results. Over time, you will learn which packing medium and location work best in your home. Careful handling and regular winter checks give your dahlias a better chance of returning for another season of flowers.
