
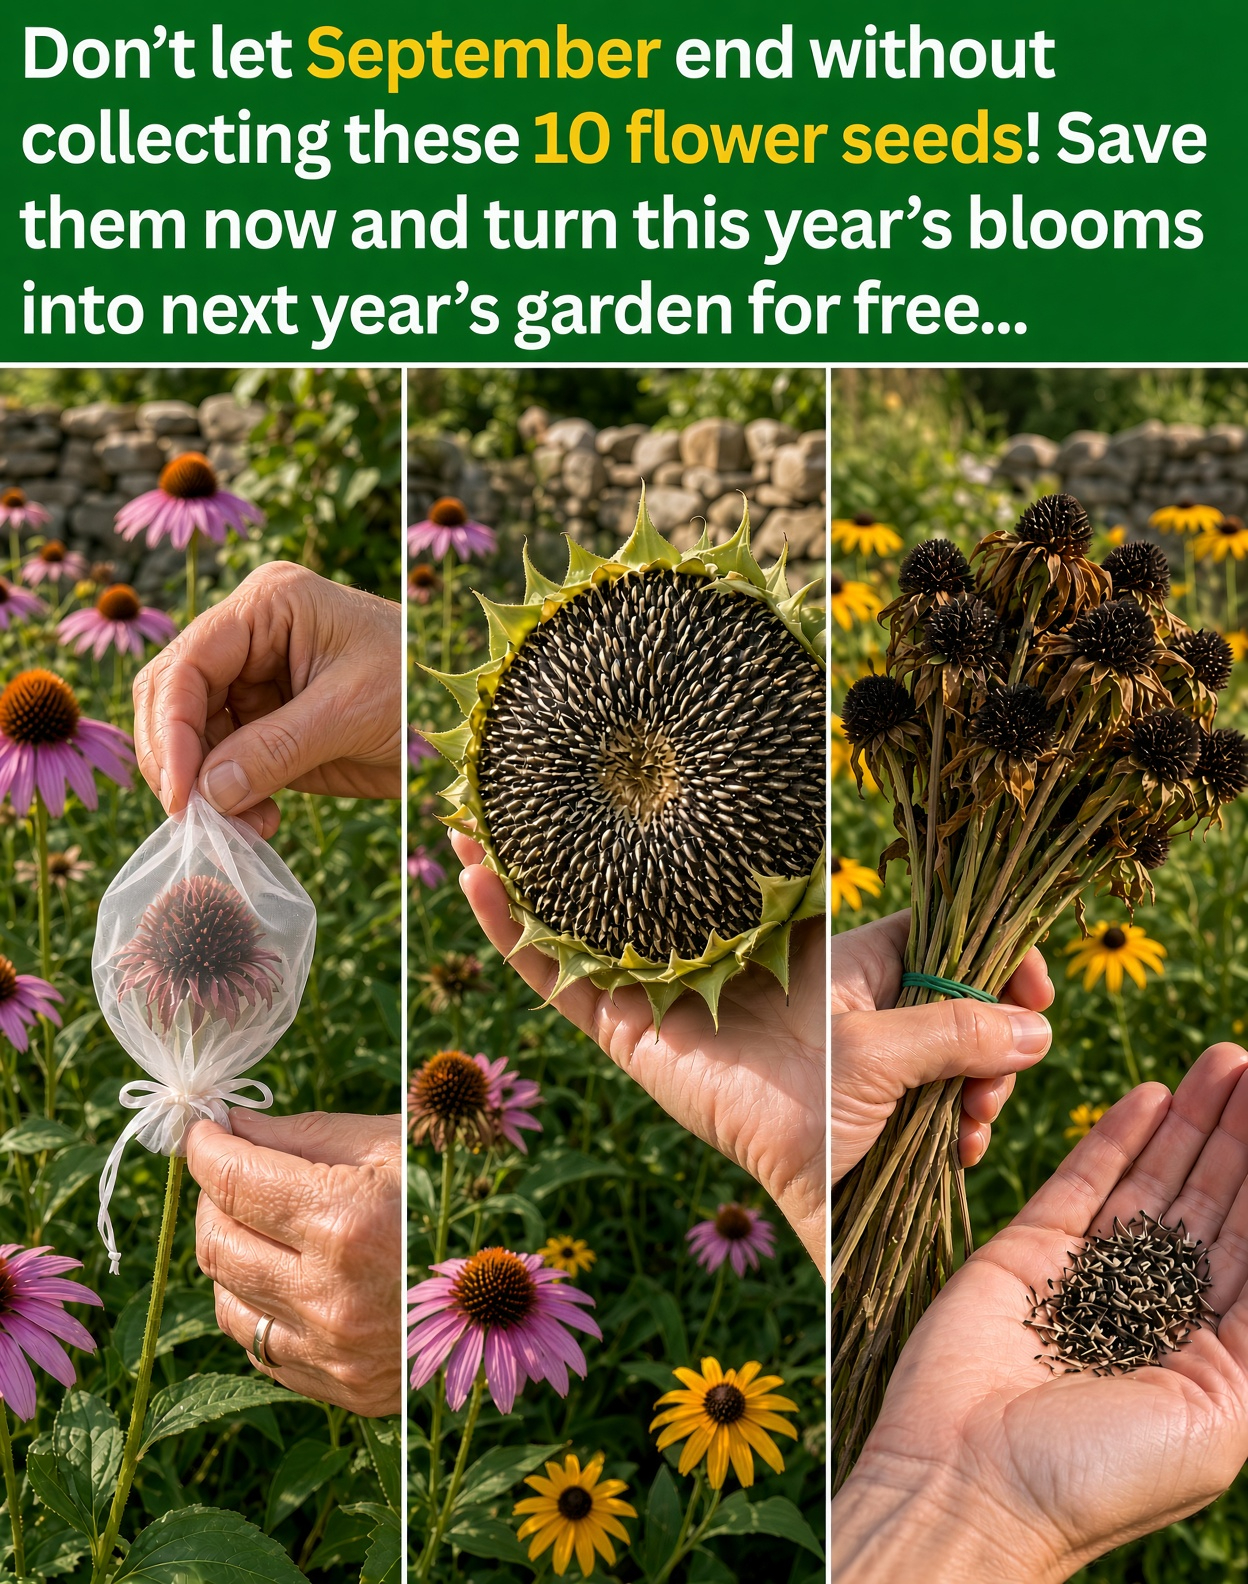
September is an excellent time to check mature seed heads on many summer flowers. Instead of buying every seed packet next spring, you can collect mature seeds from healthy plants, dry them properly, label them, and store them until it’s time to sow.
The key is timing. A faded flower isn’t necessarily ready to give you viable seed. In most cases, you want the seed head or pod to become dry and mature on the plant before harvesting.
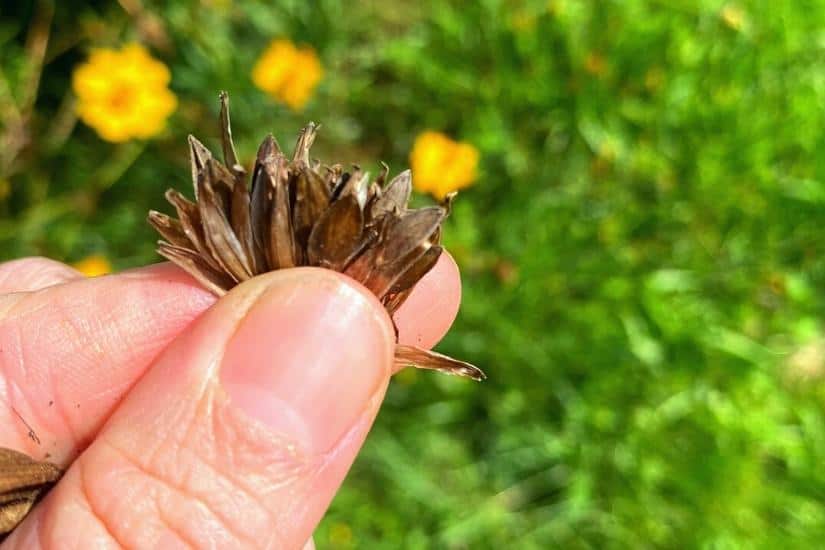
1. Zinnias
Zinnias are one of the easiest flowers for beginners to save seeds from. Once a bloom has finished flowering, resist the temptation to remove it immediately. Leave selected flowers on the plant until the petals and seed head become dry and crisp.
When the flower head is completely dry, cut it from the plant and gently break it apart over a sheet of paper or a shallow container. Zinnia seeds are often flat or arrow-shaped and can be found attached around the dried flower structure.
Choose seed heads from plants that were healthy and had flowers you particularly liked. If several zinnia varieties were growing nearby, cross-pollination can produce plants with different colors or forms the following year.
2. Marigolds
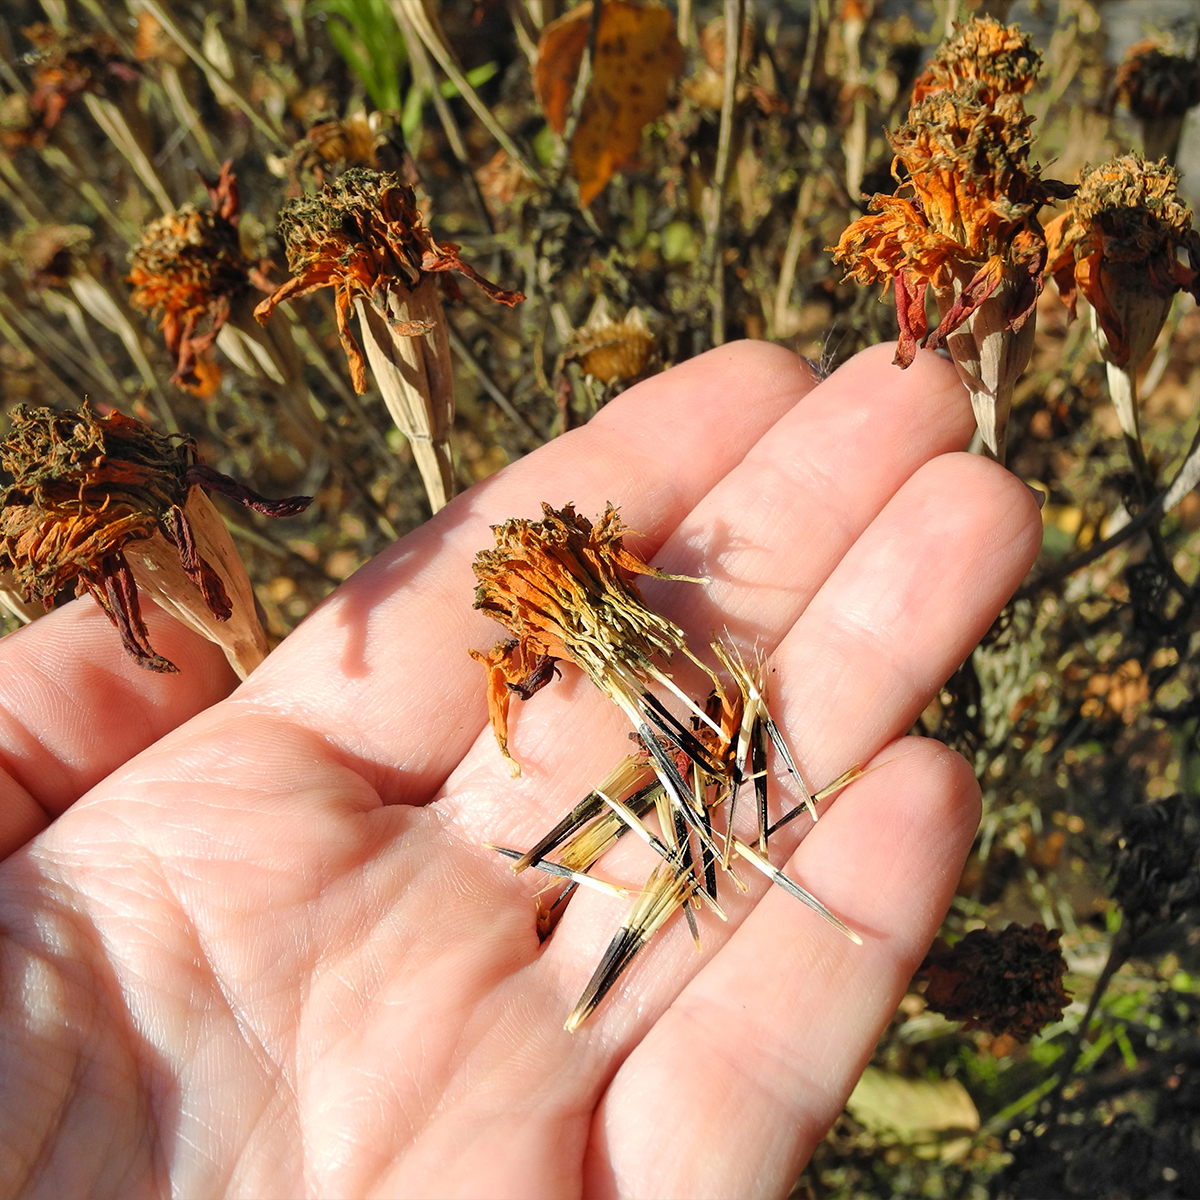
Marigolds produce surprisingly easy-to-handle seeds. As the flower fades, the head becomes dry and papery and eventually contains a collection of long, slender seeds.
Wait until the flower head is thoroughly dry before removing it. Pull the dried base apart gently and look for the mature seeds inside.
Choose a dry day for harvesting whenever possible. If a seed head is wet from rain, give it time to dry before putting it into storage.
3. Cosmos
Cosmos can produce large numbers of seeds once their flowers finish blooming. After the petals fall, the central structure develops narrow seeds that gradually darken as they mature.
Look for seed heads that are brown, dry, and easy to separate. Don’t wait too long once they reach this stage because mature cosmos seeds can eventually drop from the plant on their own.
Collecting a portion allows you to decide exactly where you want cosmos next year while leaving some seed heads behind for natural reseeding.

4. Coneflowers
Don’t rush to remove every coneflower seed head from the garden. Once the colorful petals disappear, the central cone dries into a spiky seed-bearing structure.
Wait until the cone is brown and thoroughly dry before harvesting. Cut several heads and separate the seeds indoors. Gloves can be useful because the dried cones can feel surprisingly prickly.
There is another reason to leave some behind: mature coneflower seed heads can provide food for birds during the colder months. Collect a portion for your own garden and leave the rest standing.
Because coneflowers are perennials, plants grown from seed may take time to establish before producing a large display of flowers. Some types may also benefit from a period of cold, moist conditions before germination.

5. Black-Eyed Susans
When the yellow petals of black-eyed Susans disappear, the dark central cones remain. Those brown centers can contain plenty of tiny seeds.
Wait until the flower heads have dried naturally. Cut several heads and place them in a paper bag or container. Once completely dry, gently rub or break apart the heads to release the seeds.
Don’t worry if the seeds remain mixed with a little dry plant material. For home gardening, you don’t need to create a perfectly clean commercial seed packet.
As with coneflowers, consider leaving some mature heads in the garden for birds rather than harvesting every seed.

6. Sunflowers
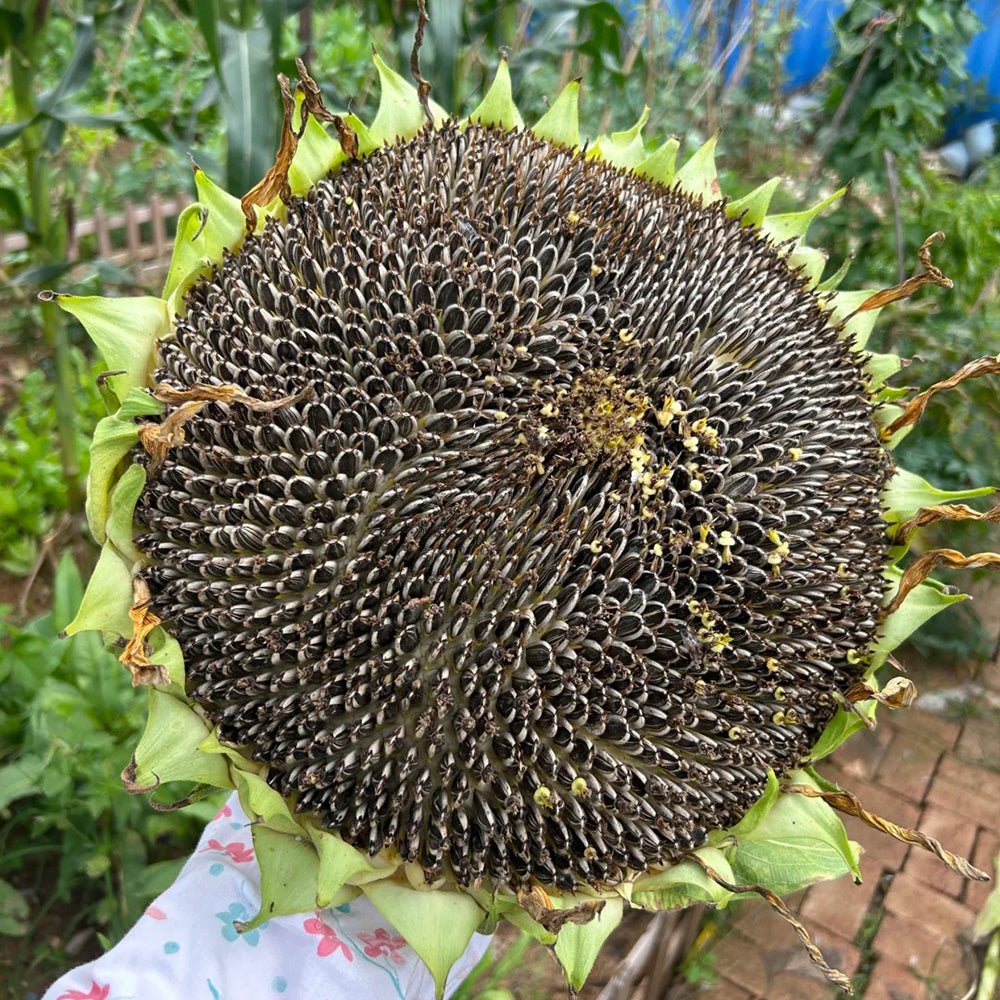
Sunflowers make seed saving especially satisfying because the mature seeds are large and easy to see.
After flowering, watch the back of the flower head. It gradually changes from green toward yellow-brown or brown as the seeds mature. The seeds themselves should look plump rather than flat and undeveloped.
Birds may reach the seeds before you do, so protect a nearly mature flower head with a breathable paper bag or lightweight covering if necessary. Avoid trapping moisture around the flower head.
Once the head is dry, cut it and rub the seeds free. For the most predictable results, save seed from open-pollinated varieties rather than assuming every hybrid will produce offspring identical to the parent plant.
7. Calendula
Calendula produces some of the most unusual-looking flower seeds in the garden. Instead of smooth, round seeds, mature calendula produces curved, hooked, crescent-like seeds.
Allow the flower head to dry after the petals disappear. The seeds should feel firm and dry rather than soft or green.
Collect several mature heads and let them finish drying indoors if necessary. Calendula can also self-seed in favorable conditions, so you can collect some while allowing a few seed heads to fall naturally.

8. Nasturtiums
Nasturtium seeds are excellent for beginner seed savers because they’re large, roundish, and easy to spot.
After the flowers fade, look underneath the plant for seeds that have dropped naturally. Mature seeds become larger and more wrinkled as they dry.
Collect the mature seeds and spread them out somewhere dry and well ventilated. Give them enough time to dry completely before putting them into an airtight container.
Because these seeds are relatively large, don’t assume that a seed that looks dry on the outside has completely dried inside. Patience during the drying stage helps reduce storage problems.

9. Hollyhocks
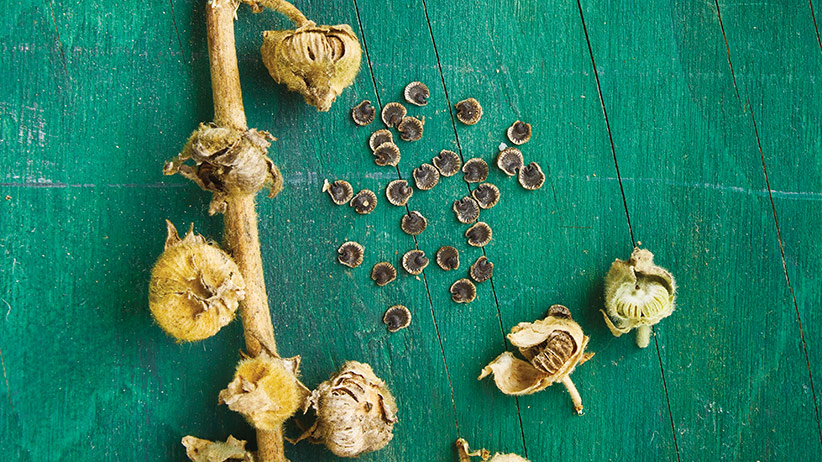
Hollyhocks produce distinctive round seed pods along their tall flower stalks. After flowering, the pods gradually become brown and dry.
Wait until the pods are mature before collecting them. A dry pod that begins opening naturally is a much better candidate than a green, soft pod.
Snip the mature pods and place them in a paper bag to finish drying if needed. Once dry, gently open the pods and remove the seeds.
Keep in mind that hollyhocks can behave as biennials or short-lived perennials depending on the variety and growing conditions. A seedling may therefore spend its first season establishing before producing a major display.
10. Morning Glories
Morning glories form obvious round seed capsules after their flowers fade. Let the pods remain on the plant until they become brown and dry.
Check them regularly because mature pods can eventually open and release their seeds. Collect dry pods before they split completely, then allow them to finish drying indoors.
Once the pods are dry, open them carefully and remove the dark seeds. Store them separately in a labeled envelope or container.
One important consideration is that some morning glory species can spread readily in suitable climates. Before deliberately saving and distributing large quantities of seed, make sure the species you grow is appropriate for your area.

How to Tell When Flower Seeds Are Ready
The biggest mistake beginners make is harvesting too early. A flower can look finished while its seeds are still developing.
As a general guide, look for several signs:
- The flower head or seed pod has changed from green to brown or tan.
- The seed structure feels dry rather than soft.
- The seeds are firm and fully developed.
- The pod or flower head begins opening naturally.
- The seeds separate relatively easily from the dried plant material.
These signs vary between species, so always pay attention to the individual flower rather than relying only on the calendar.
How to Dry Collected Flower Seeds
After harvesting, spread the seed heads or loose seeds in a single layer on paper, a shallow tray, or another dry surface.
Keep them somewhere dry with good air circulation and away from strong direct sunlight. Larger seeds and seed heads may need more time than small, already-dry seeds.
Do not seal freshly collected seeds in an airtight container while they still contain moisture. Trapped moisture can encourage mold and reduce seed quality.

How to Store Flower Seeds Until Next Year
Once the seeds are completely dry, place each variety in its own labeled paper envelope. Write the plant name and harvest date on the packet.
Store the envelopes in a cool, dry, dark location with relatively stable conditions. Avoid damp sheds, areas exposed to condensation, or places that become very hot during the summer.
If you collect seeds from several varieties, good labeling becomes especially important. A few months later, a pile of similar-looking brown seeds can be surprisingly difficult to identify.
Don’t Collect Every Seed Head
Seed saving doesn’t mean stripping the garden completely. Leave some mature seed heads standing whenever they provide useful food or shelter for wildlife.
Coneflowers, black-eyed Susans, sunflowers, and other seed-producing plants can contribute food for birds during the colder months. Collect enough for your own garden while allowing part of the natural cycle to continue outdoors.
Flower Seed Saving Checklist
| Flower | What to Look For | Collection Tip |
|---|---|---|
| Zinnia | Dry, brown flower head | Break apart the dried head and remove mature seeds |
| Marigold | Brown, papery flower head | Pull mature slender seeds from the dried base |
| Cosmos | Dark, dry narrow seeds | Collect before mature seeds drop naturally |
| Coneflower | Brown, stiff, spiky cone | Harvest some and leave some for birds |
| Black-Eyed Susan | Dry dark central cone | Rub dried heads to release seeds |
| Sunflower | Drying yellow-brown flower back | Protect mature heads from birds if needed |
| Calendula | Dry curled seeds | Collect once the seeds are firm and brown |
| Nasturtium | Large, wrinkled mature seeds | Check beneath the plant for naturally dropped seeds |
| Hollyhock | Brown, dry seed pods | Open mature pods and remove the seeds |
| Morning Glory | Brown, dry capsules | Harvest before the pods release their seeds |
Final Thoughts
Before September disappears and the garden cleanup begins, inspect those fading flowers one more time. What looks like garden debris may actually be next year’s planting material.
Zinnias, marigolds, cosmos, coneflowers, black-eyed Susans, sunflowers, calendula, nasturtiums, hollyhocks, and morning glories can all provide interesting opportunities for collecting mature seed.
Harvest at the right stage, let everything dry thoroughly, label each variety, and store the seeds somewhere cool and dry. Then, when the next growing season arrives, you’ll have a collection of flowers ready to start another garden cycle.