
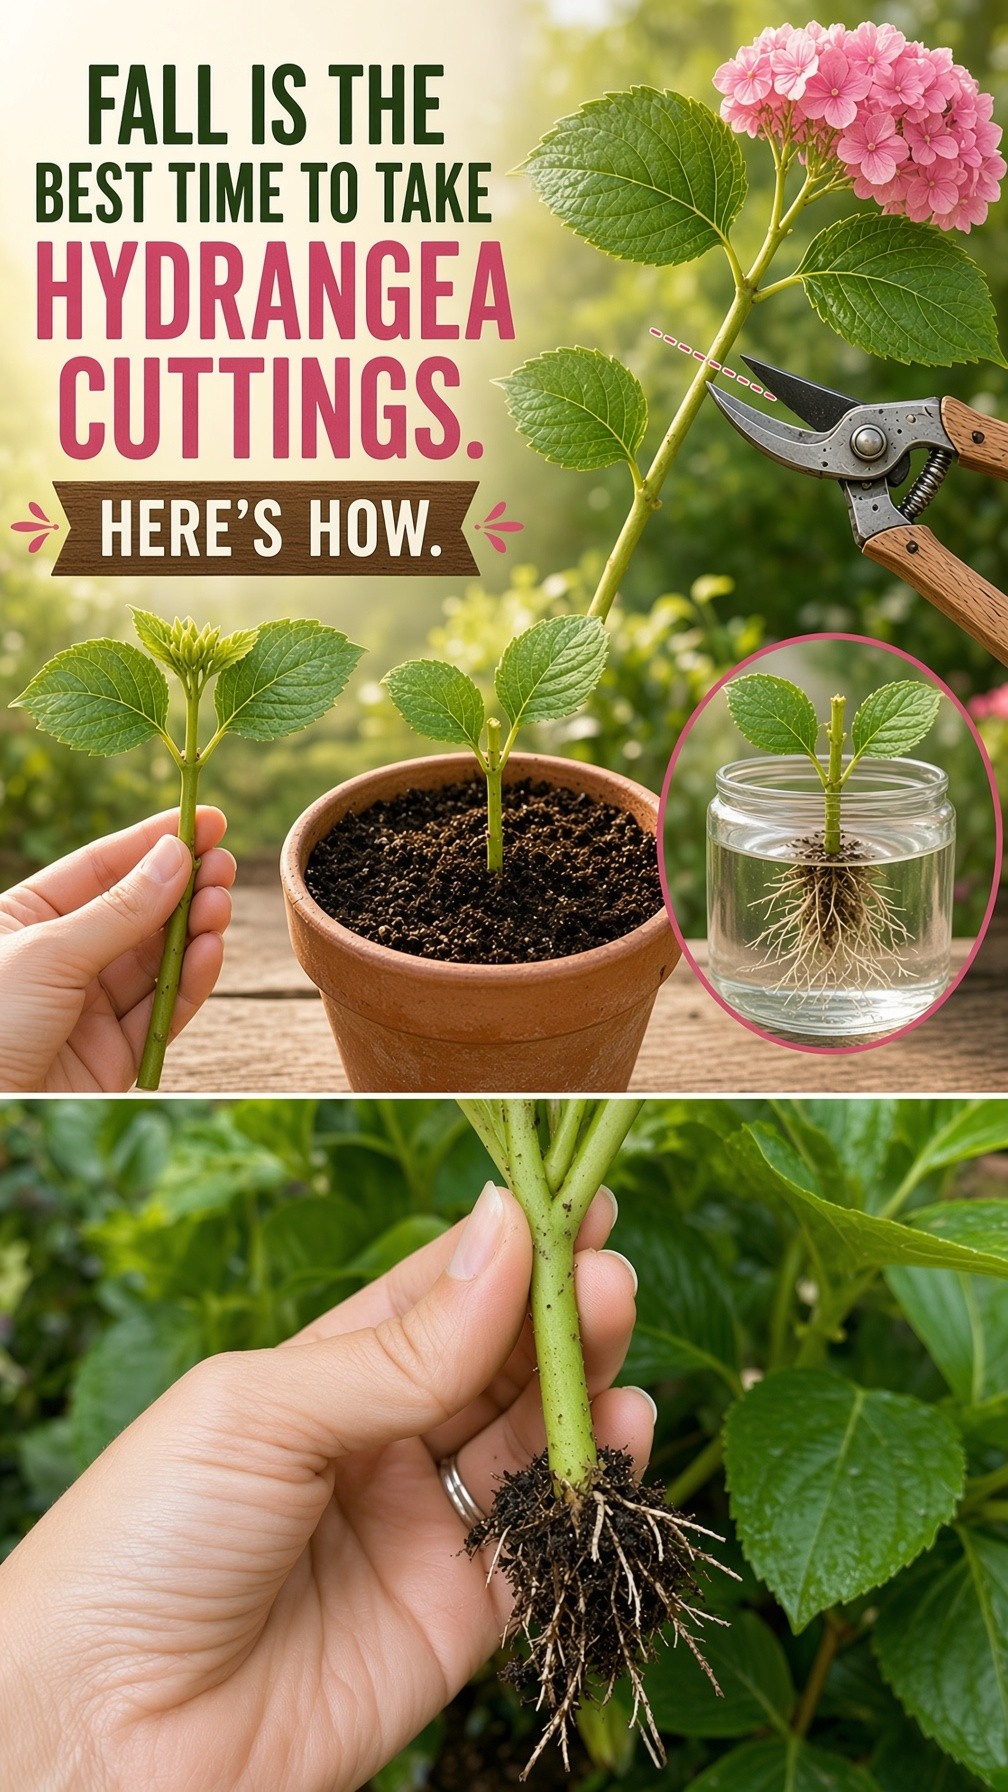
Propagating hydrangeas from cuttings is a simple way to create more plants from a shrub you already love. With the right stem, a clean cut, a fast-draining growing medium, and steady aftercare, you can turn a few healthy shoots into new plants for your garden or to share with friends.
1. When to Take Hydrangea Cuttings
Timing makes a noticeable difference when you propagate hydrangeas. For semi-hardwood cuttings, late summer through early or mid-fall is a useful window because the current season’s stems have matured enough to be sturdy while still retaining the ability to form roots. Choose a period when the plant is still carrying healthy green growth rather than waiting until stems become fully woody.
 The goal is to work with fresh, mature growth rather than old branches. This gives the cutting enough structure to handle planting while preserving the active tissue that can produce new roots.
2. Choose a Non-Flowering Stem
Look closely at the shrub before making any cuts. The best candidates are healthy shoots that did not spend the season producing a flower head. A non-flowering stem can devote more of its stored energy to developing roots instead of supporting a finished bloom.
 If the outside of the plant is crowded with flowers, check lower down or farther inside the shrub. Side shoots and less obvious green stems can provide excellent material when the most visible branches have already bloomed.
3. Cut Just Below a Leaf Node
Once you have found a suitable stem, make the lower cut immediately beneath a leaf node—the point where a pair of leaves or buds emerges. A cutting around 4 to 6 inches long is a practical size for most home propagation setups, provided it contains several useful nodes.
 The node matters because it is a natural growth point and a good place for roots to develop. Keeping the cutting compact also makes it easier to place enough of the stem below the soil line without wasting space in the container.
4. Prepare the Cutting
Remove the leaves from the portion of the stem that will sit below the growing medium. Leaving buried foliage in place can encourage decay and uses space that could otherwise contain rooting nodes. Keep the upper leaves so the cutting can continue photosynthesizing while roots form.
 If the remaining leaves are especially large, reducing their surface area can help limit moisture loss. This is particularly useful when taking cuttings in warmer weather, when an unrooted stem can lose water faster than it can replace it.
5. Use Rooting Hormone If You Want
Rooting hormone is optional rather than a requirement for hydrangea propagation. If you use it, apply a light coating to the freshly cut lower end according to the product directions before placing the cutting into the growing medium.
 Many gardeners prefer to skip hormone when working with easy-to-root plants. Good cutting material, a clean container, suitable moisture, and a well-draining mix are more important fundamentals than relying on a rooting product.
6. Choose a Fast-Draining Potting Mix
Hydrangea cuttings need moisture, but they should never sit in saturated soil. A loose propagation mix that drains quickly helps balance those two needs. A practical homemade approach is to combine quality potting compost with a coarse material such as horticultural sand or perlite.
 The exact recipe is less important than the result: water should move through the container rather than pooling around the stem. Always use a container with drainage holes so excess moisture has somewhere to escape.
7. Plant the Cuttings at the Right Depth
Fill a clean pot with the prepared mix and make planting holes before inserting the stems. Place enough of the cutting below the surface to cover at least one or two nodes, then gently firm the medium around the stem so it stands upright.
 Several cuttings can share one larger container if there is enough room for airflow. Grouping them can make winter care easier and helps the pot retain moisture more evenly than a collection of tiny containers.
8. Water Thoroughly, Then Avoid Soggy Soil
Give the newly planted cuttings a thorough drink so the growing medium settles around the stems. After that, aim for consistent moisture rather than constant saturation. Check the container regularly, especially during dry weather, and water when the mix begins to lose moisture.
 Too little water can cause an unrooted cutting to wilt, while excessive water can create conditions where the stem rots before roots develop. Drainage is therefore just as important as watering.
9. Provide Bright, Gentle Light
Place the container somewhere bright but protected from harsh, direct sunlight. A newly planted cutting has no established root system to replace water lost through its leaves, so intense sun can quickly cause stress.
 In warmer conditions, a sheltered or shaded location is usually safer. As the season cools, the container can receive more gentle light, provided the cuttings are not exposed to conditions that dry them out.
10. Maintain Humidity and Airflow
Humidity can help reduce water loss while the cuttings are forming roots. A clear cover, humidity dome, or loose plastic enclosure can create a more humid pocket of air around the leaves, but it should not press against the foliage.
 Do not seal the container so tightly that fresh air cannot circulate. Brief ventilation and sensible spacing help reduce the risk of fungal problems while keeping the environment humid enough for young cuttings.
11. Check for Root Development
Hydrangea cuttings commonly need several weeks to establish roots. After roughly a month, you can test a cutting by giving it a very gentle tug. Resistance usually indicates that roots have begun anchoring the stem in the growing medium.
 Avoid pulling repeatedly to check progress. Once roots have formed, give the young plant time to strengthen before disturbing it, especially if the weather is changing or the cutting is being prepared for winter.
12. Protect New Plants Through Winter
If you propagate toward the end of the growing season, protect young rooted cuttings from hard freezes. A sheltered greenhouse, enclosed porch, cool sunroom, or another protected location can help them get through winter without exposing tender roots and stems to severe cold.
 Once the plants are established and conditions improve, gradually transition them to their permanent containers or garden positions. With patience, a handful of well-chosen stems can become a new collection of hydrangeas without buying additional mature plants.